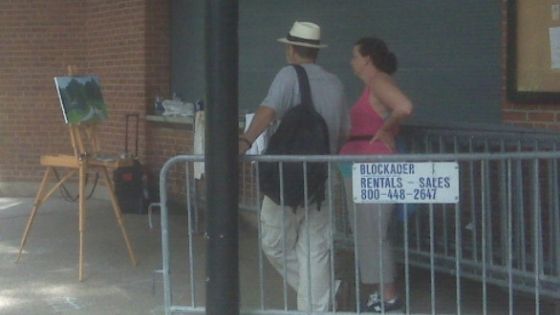
So, a few days ago I was walking through the park and came across what was obviously an art class of some kind. There were about 8 students painting landscapes, each in their own spot.
I walked past the woman in the photo who was receiving her “turn” from the teacher and I just had to listen in.
After I listened for a little bit, I thought to myself, I have to share this with the people on my mailing list and blog so I will tell you what I heard.
Drawing Mistakes
The instructor was pointing out drawing mistakes in the student’s work. That’s actually extremely common during an instructor’s critique of a student’s work. That’s fine I suppose, but you don’t need to use paint to learn how to draw. You can use a drawing tool for that.
He was mentioning that a post, stuck in the ground, that she had painted in her picture should be much higher than she had it.
Like I said above, spending time on correcting drawing really doesn’t teach you anything about using oil paint. Unfortunately a lot of time is spent on that very thing during oil painting lessons.
But, How?
He also pointed to the background and told her, “You may want to soften that area.” – This is common stuff for an art class.
The thing is, he never told her how to soften.
The instructor then went into what I call “paintingspeak.” He started telling the student, “It’s like a wrestling match and you just have to fight with your canvas and hopefully you will come out on top.”
It was at this point that I left.
Look, the instructor seemed like a nice guy and the woman had some ability, but ask yourself this:
How will any of that instruction help her make her next painting better?
In fact, will it even help her to make sure the same exact problems won’t happen again in her next painting?
What are the chances there will be a post stuck in the ground in her next painting? So telling her that the post should be higher will not help her with her next painting. If she needs to have something in her painting be longer or bigger again (meaning a drawing correction) she’ll need the art teacher to tell her where and what the correction should be… again.
What this type of instruction is actually doing, is teaching her to rely on the art teacher to point out her drawing mistakes.
If she needs to have an area softened, did she know how to soften? Maybe they went over the “how” of softening before. That is certainly a possibility. But, from the instruction I watched, the student was just supposed to know how, or the teacher assumed she knew how.
And, I don’t know what the “wrestling match metaphor” will teach her. Maybe inspiration to not give up is all I can think of, but that’s hardly technical instruction.
Now, let’s take an alternative way to learn.
An Alternative Type Of Instruction
If she had a step-by-step plan, a sort of formula or checklist that was a sequence that not only she, but everyone could reference, would it not be easier to teach someone and make corrections?
Think about this…
If this was the “veilings and glazes” stage of a set painting process that the entire class was being taught, the teacher and student would both be on the same page. There would be a similar point of reference.
You could focus on things like what your color mixture was for your glaze. You could talk about the medium that you are using for the glaze and things of that nature. How to apply the veilings at this point.
When you teach a procedure, you can always reference that procedure when working with an individual student. You wouldn’t need to talk “stuff you see wrong.” That way, the corrections aren’t random. They’re grounded in the process itself.
Talking about drawing, brush techniques (softening), and mystical metaphors are too confusing and frankly, do not give you any tangible instruction that you can apply to your next painting.
I like to bring up when you learned how to do long addition as a kid in school. Now, things may have changed since I learned it, but I learned a step by step formula: I could use this formula to add any numbers together. I could always go back to it. I could rely on it. I could use it in my very next addition problem.
Here’s the formula I learned:
Step 1) Write the numbers on top of each other like this…
 321
+792
Step 2) With the numbers now lined up over each other, add the single numbers in the right most column, and write the answer under both numbers in that same column.
Step 3) If the answer was greater than 10, write the second number (such as the “2” if the answer was 12) and then carry the one to the next column, by writing a little 1 over the other 2 numbers.
Step 4) repeat step 2 with the next column over and repeat until there are no columns left.
A definite formula was taught. You learned the steps and then you practiced using the formula adding any numbers you wanted.
The steps you learned worked immediately. And you saw immediate results.
That’s how oil painting should be taught. Step by step. With a system that makes sense.
That’s what I try to make my teaching all about. Teaching the oil painting process and formulas of traditional oil painting and the old masters so you can paint whatever you want.
Not to simply copy them, but to use the oil painting process so you can express yourself — in your own way.
When a student understands the sequence, they no longer depend on random comments from a teacher. They know where they are in the process, what comes next, and how to make adjustments. That’s how you build independence as an artist.
If you’d like to learn oil painting in this step-by-step way — with clear processes, formulas, and the traditions of the old masters — visit my online art school at EthanSemmelArtSchool.com.